
Now a days there are so many different Photoshop tips, tricks, and tutorials out there but what’s the most efficient way to edit a photo to pop? There always are a million ways to get to the outcome but I will show you the most efficient way to do this.
The few tips I will show you today are non-destructive to the original photo. What does that mean? Well, in the most simplistic way, your adjustments will go on separate layers so you can always revert to original. Let’s get started!
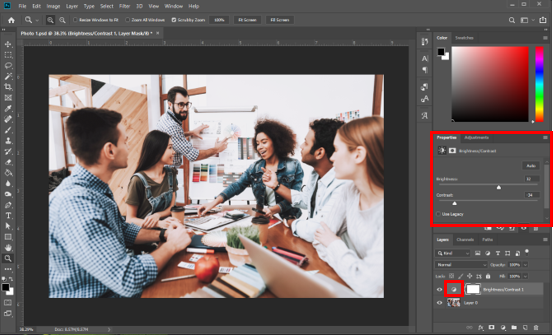
With your photo imported in Photoshop navigate to the layers section and click the icon, create new fill or adjustment layer (red box shown in image).

Then click Brightness/Contrast.
.webp?width=1388&height=815&name=2-1%20(1).webp)
After you click Brightness/Contrast you will see sliders open in the properties panel. This is where you can adjust your image or click auto for an automatic Brightness/Contrast adjustment based on your image. I would suggest to manually adjust the sliders by clicking and dragging left or right to see what looks best for your image.
Notice that Brightness/Contrast is on its own layer and can always be reopened and readjusted by clicking the layer icon in layer (smaller red box around in image above).
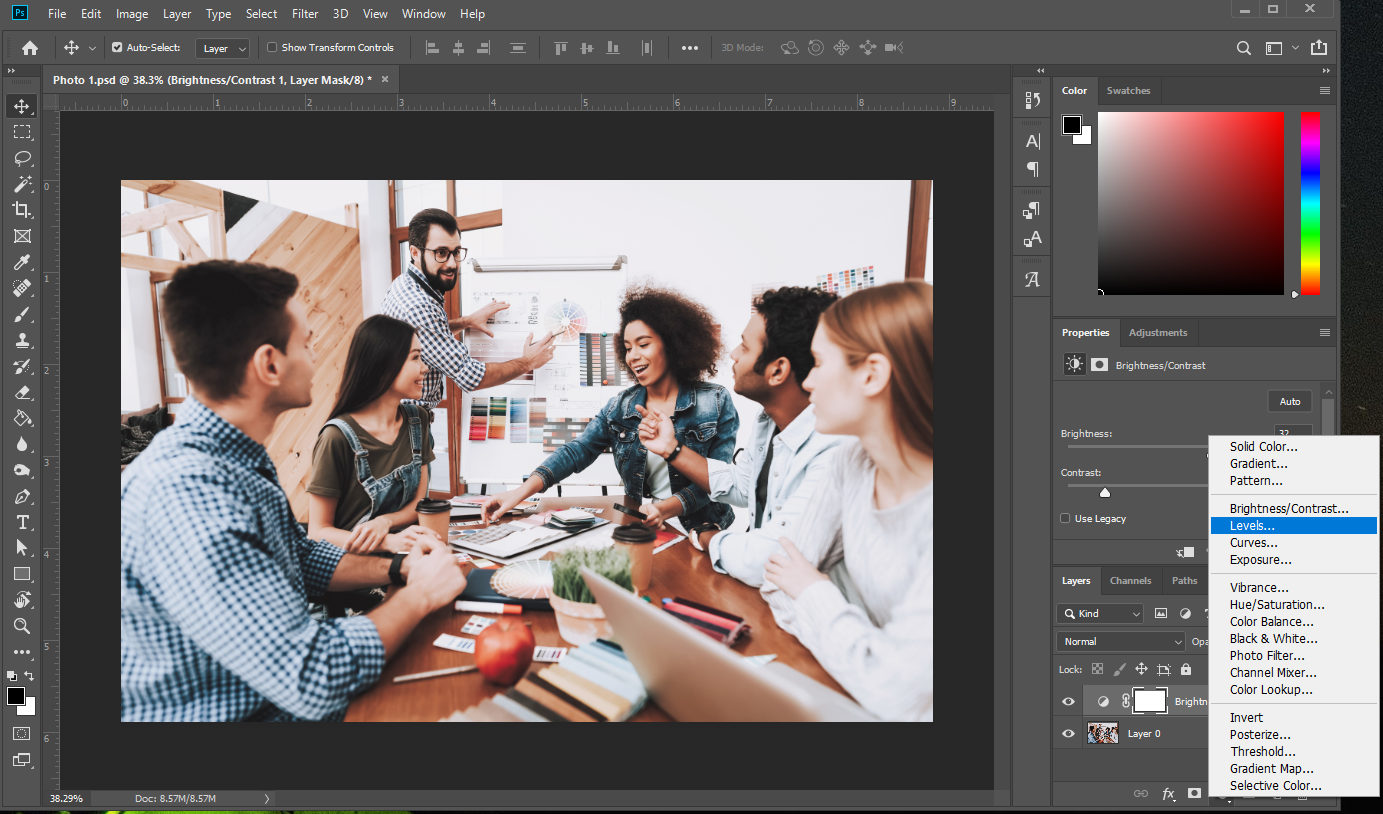
Navigate back to the layers section and click the icon, create new fill or adjustment layer (same icon shown in step one, Note, we will be accessing this adjustment layer one more time after this adjustment) and click Levels.
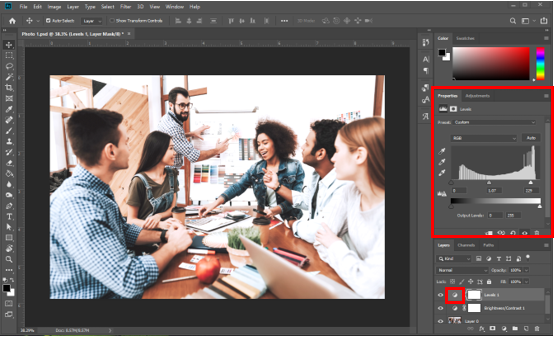
After you click Levels you will see sliders open in the properties panel. This is where you can adjust your image or click auto for an automatic Levels adjustment based on your image. I would suggest clicking Auto then adjust the sliders by clicking and dragging left or right to see what looks best for your image. Clicking Auto to start on this step really helps see what needs to be adjusted.
Notice that Levels is on its own layer and can always be reopened and readjusted by clicking the layer icon in layer (smaller red box around in image above).
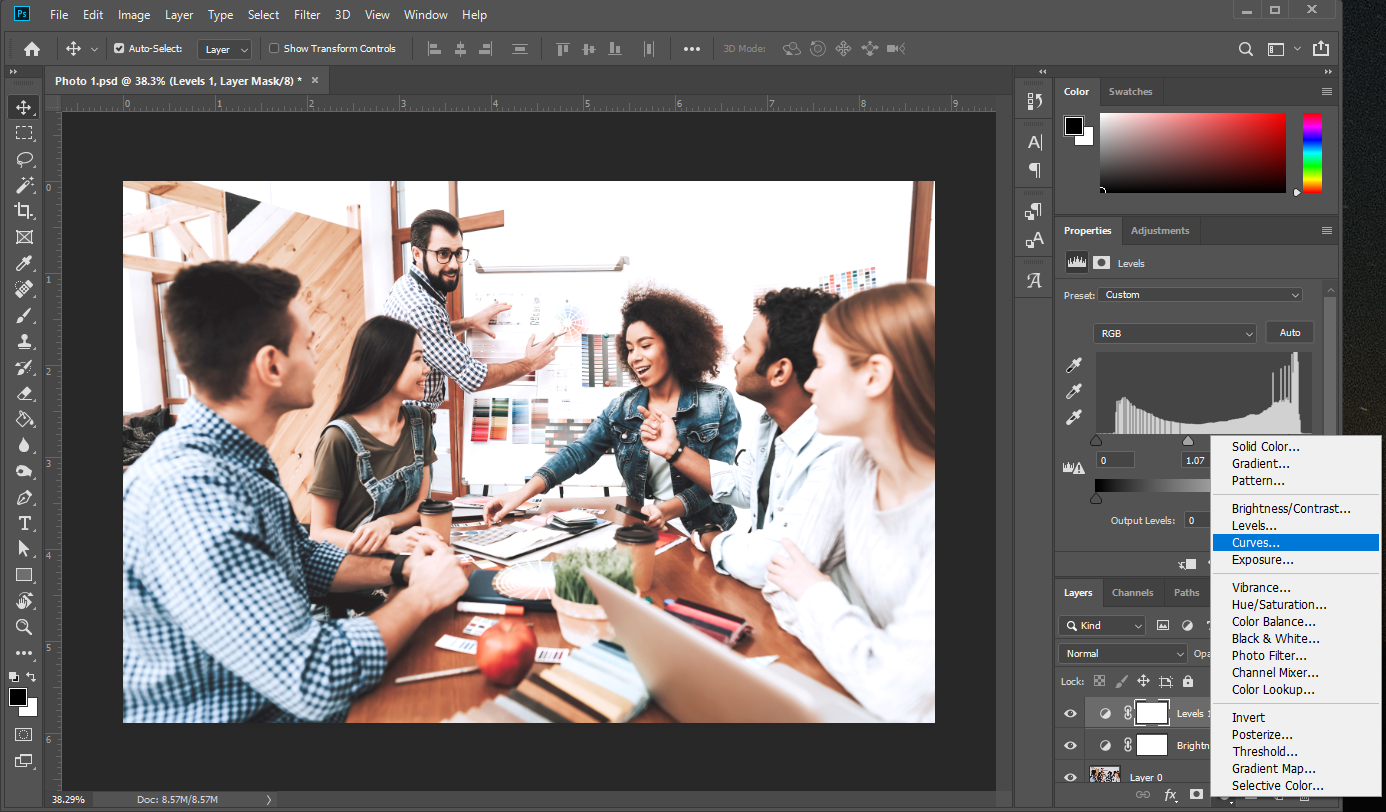
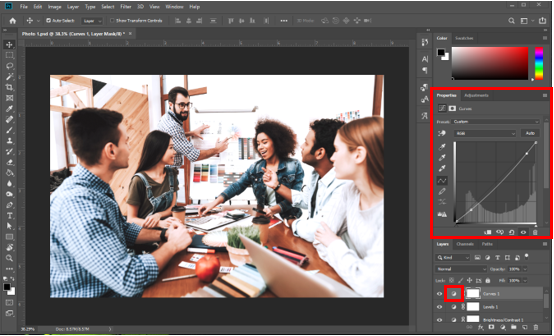
Navigate back to the layers section and click the icon, create new fill or adjustment layer (same icon shown in step one and two) and click Curves.
After you click Curves you will see sliders open in the properties panel. This is where you can adjust your image or click auto for an automatic Curves adjustment based on your image. I would suggest clicking Auto then adjust the curve by clicking and dragging left or right to see what looks best for your image. Clicking Auto to start on this step really helps see what needs to be adjusted. You can add points on the curve if you click different parts of the curve itself.
Save out your working document. Then save out your final image. First, Click File, Save As…. This will take you to a prompt box to name and select file type. Your working document will be saved out as a Photoshop File or .PSD, then click save. After that is completed navigate back to File, Save As…. This will take you back to the same prompt box to name and select file type. Your final image should be saved out as a .JPEG, then click save. Here is my final output image.

I hope these quick 4 steps help you enhance and pop your images before you share them with your audiences. If you are interested in more quick tips and tutorials for Photoshop please leave a comment. If you would like the THAT Agency team to help out with enhancing your images, video, or content please visit THATagency.com to find out more.
Tags: Social Media, Web Design, Digital Marketing, General, Graphic Design

What Is Organic Traffic? (Complete Beginner Guide)
What Is Conversion Rate Optimization? (CRO Basics Explained)

What Is Engagement Rate? (Marketing Metric Explained)

How to Appear in ChatGPT Answers: Understanding AI Citation Signals

AI-Generated SEO Content at Scale: Why Output Without Strategy Damages Authority

700 S. Rosemary Ave.
Suite 204-707
West Palm Beach, FL 33401
P: 561.832.6262
F: 561.832.7707


