
Ok, so something I've seen a decent amount of website owners really going for these days are shiny gold text effects. The problem is that most of them end up looking a little too gaudy or just really poor quality.
So what I've got for you today is a tutorial on how you can create a professional, realistic gold text in Photoshop. Here are the steps (and there's a video below).
Step 1: Open Photoshop :-)
Step 2: Type your name (or desired text) and use the following specifications: Georgia, Bold, #666666 (this is the hex code for web-based colors, it turns out to be the gray you see here). By the way the font size I use in this demonstration is 138 point.

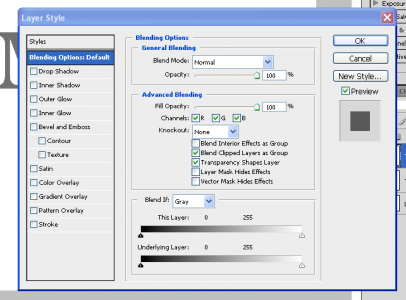
Step 3: Open up the Layer Options Dialog box by double-clicking the text layer of the text you desire to make gold.
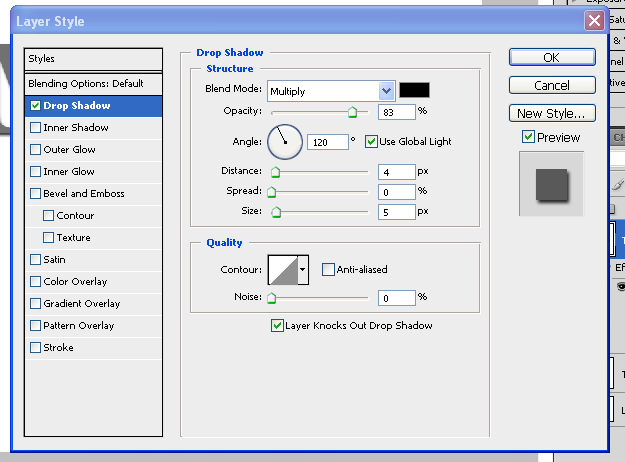
Step 4: Now the first thing you want to do is add a Drop Shadow. So, click the "Drop Shadow" option in the Layer Styles dialog box. Now make your settings exactly like the settings in the picture below:
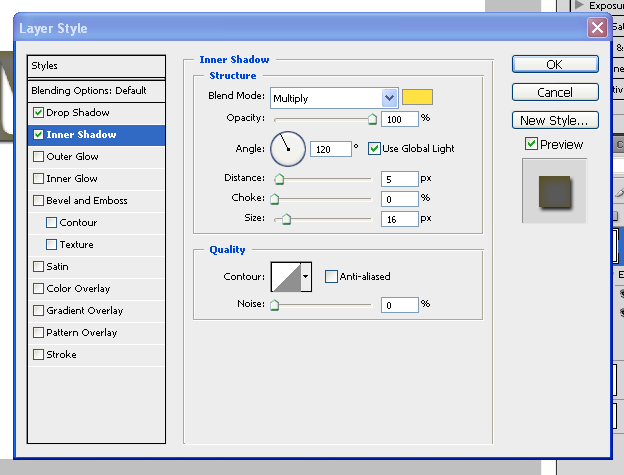
Step 5: Now it is time to add an Inner Shadow. Click the "Inner Shadow" option in the Layer Styles dialog box and set the settings exactly as you see in the picture below (the yellow color is #ffcc33):
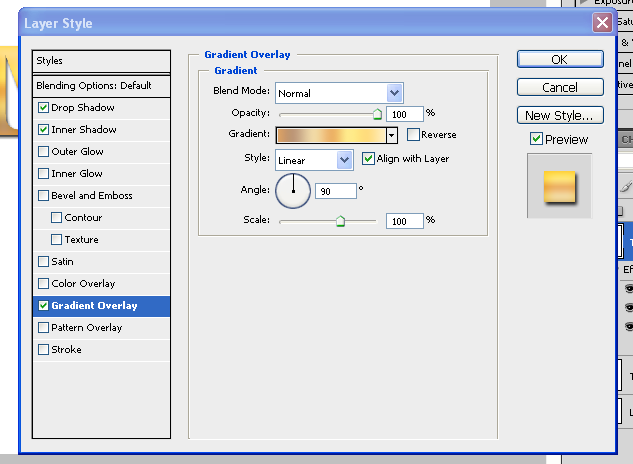
Step 6: Now it is time to add a gradient overlay. First, you need to click the "Gradient Overlay" option in the Layer Styles dialog box. Now look below the "Opacity" slider and you will see where it says "Gradient" with a color bar next to it. Click that color bar to open the Gradient Editor which looks like this:
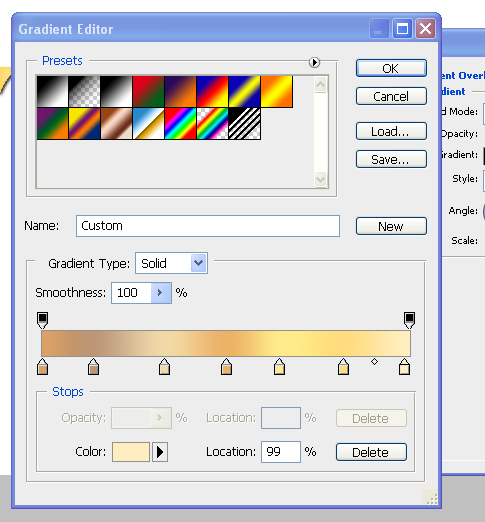
To achieve the golden gradient you see in the color bar above, use the following settings:
#cc9966 location 0%
#cc9966 location 14%
#ffcc99 location 33%
#ff9966 location 50%
#ffff99 location 64%
#ffcc66 location 82%
#ffffcc location 99%
Now, click "OK".
We're still on Step 6, because now you need to make sure the "Gradient Overlay" settings are exactly as you see it in the following picture:
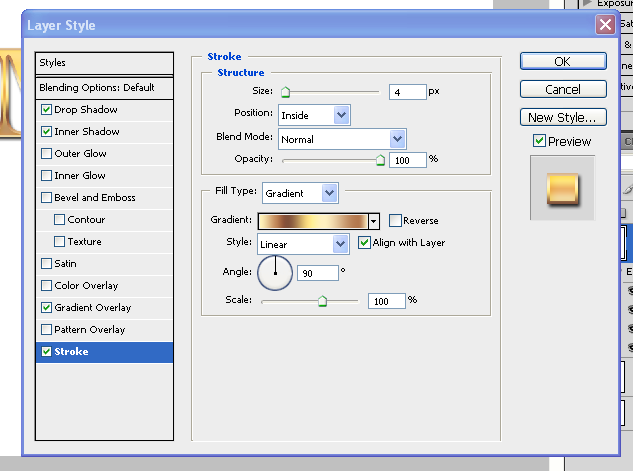
Step 7: Now, we need to add a stroke. So, click the "Stroke" option in your Layer Styles dialog box. Make sure that the settings are exactly the same as the following picture. Please note the FILL TYPE should be changed to Gradient, then open the Gradient editor and use the following settings:
#ffffcc location 1%
#cc9966 location 16%
#996633 location 27%
#ffcc99 location 45%
#ffffcc location 60%
#cc6666 location 91%
#ffffcc location 100%
Step 8: Congrats! You now have Gold Text! Save the settings so you don't have to redo this every time you want some gold text effects.

Thanks for checking out this photoshop gold text tutorial and I'll talk to you soon!
Tommy

Tags: Web Design, General

THAT Agency Partners with Spectrum Exteriors for Colorado Hail Recovery

Google Ads for Car Dealerships: Boost Test Drives with These Proven Campaigns

SEO for Electricians: How to Get Found by High-Paying Clients

These Social Media Trends Are Reshaping Digital Marketing

What Most Brands Get Wrong About Marketing Funnel Stages

700 S. Rosemary Ave.
Suite 204-707
West Palm Beach, FL 33401
P: 561.832.6262
F: 561.832.7707


